
[podbean resource=”episode=hdaku-6cf778″ type=”audio-rectangle” height=”100″ skin=”1″ btn-skin=”107″ share=”1″ fonts=”Helvetica” auto=”0″ download=”0″ rtl=”0″]
Summary
This episode will show you how to get the most out of the six most common types of scenery in Age of Sigmar. Each of these can improve your army and help you win games. But scenery can also hamper your army and your plans. We’ll tell you what you need to know!
- What are the kinds of scenery in Age of Sigmar?
- Before the tournament – check the pack and consider scenery in list design
- Mystical terrain
- When do you take the test?
- Do you need to take the risk?
- Damned terrain
- Arcane terrain
- Deadly terrain
- Sinister and Inspiring terrain
- Conclusion and key takeaways
- Further resources
What are the kinds of scenery in Age of Sigmar?
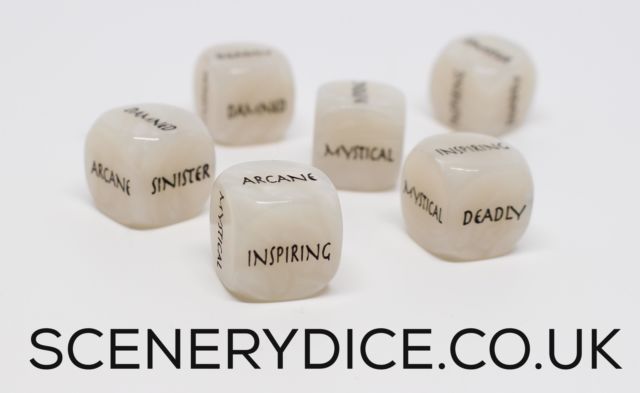
In Age of Sigmar, there are six main types of mysterious landscapes or scenery used in matched play games. They are Damned, Arcane, Inspiring, Deadly, Mystical, and Sinister.
Additional and more specialist scenery types such as Sylvaneth Wyldwoods, Realmgates and Balewind Vortices will be the subject of later episodes. For now, this episode will show you how to get the most out of the six most common types of scenery.
Before the tournament – check the pack and consider scenery in list design
As preliminary points consider how scenery can be taken advantage of in your list and check the pack for any variations or house rules.
In a standard matched play game, and most tournaments, you will roll for mysterious terrain before sides are chosen. A great way to do this is with Scenery Dice. You can then mark with the dice or another token. Other tournaments will have rolled the terrain before the start of the tournament and fixed the terrain festures for the entire tournament.
The other point to check is whether there is a house rule about when the effects of terrain occur in the hero phase. By default, they happen when chosen by the controlling player. You can decide whether to roll before or after casting spells, using command abilities or other steps. As we’ll see there are circumstances where one order is more beneficial than another. However, some tournaments house-rule that you must take the effects of terrain at the start of the hero phase. So check the pack in advance.
Mystical terrain
“roll a dice in your hero phase for each of your units within 3″ of this terrain. On a roll of 1 the unit is befuddled and can’t be selected to cast spells, move or attack until your next hero phase. On a roll of 2-6 the unit is ensorcelled, and you can re-roll failed wound rolls for the unit until your next hero phase.”
As you can see, Mystical terrain can either provide a significant benefit (re-rolling failed wound rolls) or cause your key combat unit or caster to stand around ineffectually. If your unit is befuddled, then it is also at significant risk of being charged and taken out in combat as it can’t defend itself.
The effects of Mystical terrain are even more significant given that the effect lasts until your next hero phase – so if your opponent wins priority for the next battle round, and gets two rounds in a row, then you are potentially befuddled for that entire time.
Mystical terrain is most useful on units which:
- get bonuses on their wound rolls (such as Grave Guard); or
- have large range – which means that if they are befuddled for a turn, the impact on their role in your list is more limited than for a less mobile unit.
Therefore, there are two key considerations: when do you take the test? and do you need to run the risk?
When do you take the test?
Assuming there is not a tournament house rule, you get to choose when in your Hero Phase you test for the effects of Mystical terrain. Whether you choose to do it before or after other effects depends on your army and the role of the unit potentially subject to the test.
If the unit is a caster or your general, you will probably want to roll for mystical after you have achieved everything else you want in the phase. Cast your spells, use your command ability and then roll. Or if you don’t want to take the risk of being befuddled, use a Hero phase move to get your unit our of the way first.
However, if you are going to be applying a lot of buffs to a main combat unit, then you will want to take the test first before applying the buffs. As Terry Pike reminded me over Twitter, there is no point in buffing a unit to make it fly, increase its armour save, give it +1 to hit, whip them, add run and charge for it to just then sit there befuddled.
Do you need to take the risk?
Consider the game situation. Do you need to take the risk that your unit will be befuddled? Are you winning or losing? Do you need to push? Does your unit need a boost in combat effectiveness in order to take out a target unit?
Mystical terrain can have a massive impact on the game. Just make sure you use it wisely.
Damned terrain
“if any of your units are within 3″ of the terrain in your hero phase, you can declare that one is making a sacrifice. If you do so, the unit suffers D3 mortal wounds, but you can add 1 to all hit rolls for the unit until the next hero phase.”
Damned is great, especially if you have combat units with the ability to regrow wounds (think Sylvaneth Kurnoth Hunters) or resurrect models (again Grave Guard).
Ideally you want units that can take 3 mortal wounds and not lose effectiveness, or the effectiveness is greatly increased such that the benefit outweighs the cost of losing a few wounds (for instance, 30 Bloodletters).
In terms of timing, take the Damned test first, then cast your spell to regrow or heal your unit.
Arcane terrain
“add 1 to the result of any casting or unbinding rolls made for a wizard within 3″ of this terrain feature.”
Arcane is a perfect piece of terrain for boosting your casters that can also be stacked with other items such as Ranu’s Lamentiri to improve your chances a spell will be cast.
While all casters will benefit, the greatest uses are for:
- reducing the risk of failing spells with a low casting value or essential spells for your army; and
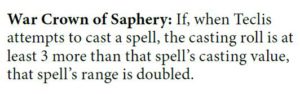
- spells that get boosted by succeeding by a certain amount – Teclis for instance.
Deadly terrain
“roll a dice for any model that makes a run or charge move across, or finishing on, this terrain. On a roll of 1 the model is slain.”
Deadly terrain can hurt. All of your models, regardless of size or battlefield role, can be lost on the roll of a 1 – an 17% chance… ouch!
A local at a recent New Zealand tournament managed to lose Gordrakk and 4 brutes all in one turn on the same piece of deadly terrain. Needless to say it was pretty much game over then.
There is no limitation or exception for monsters, heroes or behemoths and no saves of any kind are available.
The only exception are Grot Spider Riders who have a Wall-crawler ability that allows them to ignore terrain of all kinds.
Place a hero or unit in to gain the extra cover save bonus and if something changes them then they have a chance to lose those models.
If you do need to go near Deadly terrain, the key to remember is that it only takes effect if the model runs or charges through. Standard moves, hero phase moves and pile-ins are all fine. So, if you have to charge a unit that is stationed in deadly terrain, send one model in within ½” (all that is necessary to complete the charge) and then have the rest of the unit outside the terrain and pile-in.
Sinister and Inspiring terrain
The final two categories, Sinister and Inspiring, both effect a unit’s bravery.
For Sinister – “any of your units that are within 3″ of this terrain feature in your hero phase cause fear until your next hero phase. Subtract 1 from the Bravery of any enemy units that are within 3″ of one or more units that cause fear”
For Inspiring – “add 1 to the bravery of all units within 3″ of this terrain feature”
By altering a unit’s Bravery, one more or one fewer model is likely to run away from a Battleshock test. Use a counter to remember which of your units causes fear. NB: the fear effect from Sinister terrain does not stack so you get no additional bonus if 2 fear-causing units are within 3″ of an enemy unit.
However, Bravery is not just relevant for Battleshock tests. There are a number of effects and abilities within the Death faction which are tied to a unit’s Bravery. For example:
- Death Allegiance Ability – Death Incarnate – in your hero phase, pick an enemy unit within 3″ of your general and roll two dice. If the total rolled equals or exceeds the enemy unit’s Bravery, it suffers D3 mortal wounds.
- Nagash’s Soul Stealer spell
- Terrorgheist – Death Shriek
- Tomb Banshee – Ghostly Howl
- Mortis Engine – Wail of the Damned
- Mourngul – Ghastly Apparition
Lists which seek to maximise some of these effects (colloquially “bravery bomb” lists) will be the subject of a later episode.
Conclusion and key takeaways
The key point to take away is that scenery and terrain can have a significant impact on your game and can give your army a great boost.
When you are choosing table sides, and how you deploy your forces, take into account what kinds of scenery are on the table and how you can put them to best use. Weigh the risk and reward of cover and the terrain effects to get the most out of your army.
Further resources
Leave a Reply
You must be logged in to post a comment.