AoS Shorts: Your Essential Guide to Age of Sigmar

The Priority Roll – How to plan for it and put yourself in the best position to win!

[podbean resource=”episode=xsant-6da8fc” type=”audio-rectangle” height=”100″ skin=”2″ btn-skin=”109″ share=”1″ fonts=”Helvetica” auto=”0″ download=”0″ rtl=”0″]

The priority roll – love it or hate it – is a defining feature of Warhammer: Age of Sigmar.  It is loathed by those who feel it decides a game on one roll.  It is enjoyed by those who want the challenge of planning for multiple variables and always feeling in with a chance to swing the momentum of the game.

For me, I love the priority roll.  Age of Sigmar is not solely an application of mathematics.  While understanding risk, probability and expected outcomes are important to success they are not the be all and end all.  You need to adapt on the table and respond to your opponent and changing circumstances.  It is that engagement and challenge, the application of strategy and tactics to the variability of dice rolls that is why I love the game.   The priority roll adds replayability and keeps an underdog in the game for longer.

So how do you plan for a random dice roll?  If you are like me and you don’t have a Rainman-like ability to consider every possible permutation, what do you do? In this episode I set out how to account for the priority roll and the key points you need to keep in mind during the game.

  1. List design
    1. Chaff
    2. Mobility
    3. Redundancy
  2. Influence the Priority Roll
  3. Strategy
    1. Scenario
    2. Check threat ranges
    3. Buff your units
    4. Deter your opponent with counter-threats
    5. Push – make your opponent make hard choices
    6. Finish them – target selection is key
  4. Conclusion
  5. Further Resources

List Design

Planning for the priority roll begins with good list design and includes many of the features I discussed in my earlier episode.  Which you can find here.

Chaff

Cheap disposable units – commonly referred to as chaff or flak –  protect your units by shielding them from charges and restricting your opponent’s movement should they get a double turn.

Mobility

Mobile armies are less dependent on the double turn to achieve their objectives, and are more resilient and adaptable should your opponent get a double turn against you.

Redundancy

And finally redundancy built into your list will help you deal with the double turn.  If you have one powerful unit (or death-star) your chances in the game rest on its fate.  If your opponent gets a double turn they may be able to concentrate their forces and take out your key unit.  If you have several combat threats or damage dealing units then losing one of them has a correspondingly lesser impact on your chances of success.

Influence the priority roll

[UPDATE – the ability to influence the priority roll will be removed in GHB2017]

Outside of these general list design comments, there are also ways of directly influencing the priority roll (most famously, the now obsolete ability of Kairos Fateweaver to change an opponent’s dice roll to a number of your choosing).  Now it is important to check with the tournament pack because many tournaments will have a house rule limiting or removing the ability to effect the priority roll.

However, if there are no such restrictions, then there are two battalions and one unit which can help shift the game in your favour.

Lords of the Lodge

First, the Lords of the Lodge battalion for Fyreslayers.  This battalion is 160 points and requires you to take a Runefather, Runemaster, Battlesmith and 1 unit of Heathguard Berzerkers.  This battalion has the Hot Blooded Fury rule which allows you, once per battle, to declare before the priority roll that you want to seize the initiative.  Once you do so, you will add 1 to your priority roll for each hero from the battalion on the battlefield.  Therefore, you could have a maximum of +3 to the roll (an 87.5% chance of winning the roll).

Overlords of Chaos

Second, the Overlords of Chaos battalion from the Everchosen book allows you to know in advance who will be going first in the next battle round.  This battalion is 120 pts and requires you to take Archaon,  a Gaunt Summoner of Tzeentch and a unit of Varanguard.  If at the start of the hero phase, Archaon is within 3″ of the battalion’s Gaunt Summoner then he can demand a boon of prophecy.  Roll a dice and keep the result hidden from your opponent until the start of the next battle round.  Reveal it at the start of the battle round, and on a 1 to 3 your opponent takes the first turn, and on a 4 to 6 you take the first turn.

Skink Starseer

Third, and for me the most versatile and cost-effective method of altering the priority roll is the Skink Starseer.  It is 160pts and can be taken in a Seraphon army, mixed Order army or in the Sylvaneth battalions allowing Order units (most commonly the Gnarlroot battalion because you can cast two spells).    The Starseer’s Cosmic Herald rule allows you to choose a number on a D6 in secret at the beginning of each of your turns.  Your opponent does the same.  Unless your opponent picks the same number as you, you gain the number of re-rolls you have selected.  If the opponent does pick the same number, then they get the re-rolls! These re-rolls can be used on any dice roll, including the priority roll and  your opponent’s dice-roll (see the Order FAQ here).

Strategy

So assuming you already have chaff, mobility and redundancy built into your list, and you can’t or won’t run the battalions mentioned in the previous section, how do you account for the priority roll on the table-top?

Scenario

The scenario can have the greatest impact on how you plan for the priority roll.  Depending on the scenario, you may choose to give your opponent a double-turn.  This may seem counter-intuitive in isolation but can mean that you can win the game if you get a later double-turn.

In Blood and Glory, you can win a major victory at the start of the third battle round if you control each of the four objectives.  Therefore, having a double turn from the second into the third battle round can win you the entire game if you can take advantage.  Make sure you protect your objectives so that you don’t find the game slips away from you.

In Gift from the Heavens, the meteors arrive at the start of each of the players’ second hero phases.  Therefore, you may want to go second in the second battle round so that you have the advantage of knowing where both meteors are.

Check threat ranges

As always, be aware of the threat range of your units and your opponent’s units.  How far can they move, and then at what range can they do damage?  The most elite units of the game (such as Skyfires) will be able to cover most of the board if they get a double turn.  However, if your opponent is not particularly mobile, or has a short threat range, you may choose to give them an early double turn.

Buff your units

Prepare yourself for being on the receiving end of a double-turn by making sure your key units have all the necessary buffs and support spells placed on them.  You don’t want them to be facing two turns of damage output without all the protection they can get.

Deter your opponent with counter-threats

Set-up deterrents or traps.  This means moving your units in a way that they mutually support each other.  If your opponent gets a double turn and wants to threaten one of your key units, make sure you have combat support units which are close enough to pile in to help, or can counter-charge in the next turn.  Having enough supporting power in close proximity might mean that you deter your opponent from charging in the first place.

Push – Make your opponent make hard choices

If you are pushing a strong combat army, play aggressively to put your opponent in a tough position.  If they win the priority roll, they will have to choose whether to give the initiative to you (and on which you can capitalise) or take it for themselves (but potentially at the cost of bad match-ups).  As I’ve mentioned on previous episodes, the more you can make your opponent make tough decisions, the more success you will have.

Finish them – target selection is key

And finally, should you get the double turn yourself make sure you take advantage of it.  If you are facing armies that are dependent on regrowing or healing units (thinking Death and Sylvaneth here), make sure you kill off units completely while you have the chance.  Focus all your fire until the unit is gone.  There is nothing worse than leaving a model alive in a Necroknight unit and have a whole bunch pop back up next turn.

Conclusion

The priority roll is a key feature of Warhammer Age of Sigmar that adds drama, contestability and replayability.  While it may seem an unwelcome random element that does not reward strategy or gameplay, this is not the case.  The priority roll, like everything in a dice game, involves risk management and, with smart play, you too can win more games despite the dice roll.

Further Resources

Deployment – how to set-up to win games!

[podbean resource=”episode=kmnp5-6d4736″ type=”audio-rectangle” height=”100″ skin=”1″ btn-skin=”107″ share=”1″ fonts=”Helvetica” auto=”0″ download=”0″ rtl=”0″]

Effective deployment is fundamental to success at Warhammer: Age of Sigmar.  While good deployment will not win you a game, poor deployment can leave your key units exposed, your key threats neutered and you quickly behind on the scenario.  So how do you deploy well?

There are so many variables involved in deployment – there are no guaranteed answers.  All you can do is have a plan to put yourself in the best position, and then adapt accordingly.  Therefore, in this episode I’ll give you a methodology for approaching deployment.

  1. Deployment and set-up: the rules
  2. Which side to choose?
  3. Why finishing deployment first matters
  4. Consider deployment in list design
  5. Battalions and deployment
  6. In which order should you deploy your units?
  7. Where to place your units?
  8. Deployment off the table
  9. Take the first or second turn?
  10. Conclusion
  11. Further resources

Deployment and set-up: the rules

Let’s start with the rules for deployment.  Each player rolls a dice.  The winner chooses territory and will start deploying first.  Players then alternate setting up units until all units are set-up.  The players that finishes setting up first always chooses who takes the first turn.

A unit is set-up even if it is not placed on the table-top but is instead deployed in a location other than the battlefield – for example, in the spirit paths, tunnels, clouds etc.

The scenarios will tell you where to set up and if there are any limits (for example, Escalation).  As a minimum, all units are at least 12″ from enemy territory.  Note that the FAQ has changed the deployment zones for Escalation – you can find a replacement deployment map made by @golongdesign in the resources section here.

Which side to choose?

If you win the roll off, you get to choose the side.  While you may be tempted to just stay with the side of the table you are standing on, just because you can’t be bothered moving your army or squeezing through long rows of gamers, it is worth deciding.

What should you take into account?  Assess where the mysterious terrain is on the board and the objectives for the scenario.  For the mysterious terrain, what would help your army?  Arcane for spellcasters, mystical or damned for a combat unit? What would benefit your opponent – i.e. can you deprive them of a piece of scenery that would give them a significant advantage.

The Double Turn – why choosing the first turn matters

Finishing deploying first is important because you get to choose who takes the first turn.  If you make your opponent take the first turn, then you have a chance of winning the priority roll at the end of first turn and getting a double turn early.  By getting the first double turn, you can dictate the early development of the game, swarm over objectives and neuter your opponent’s key pieces before they even really get started.   There are a couple of situations where you may consider taking the first turn and I’ll return to them later.

Consider deployment in list design

So you need to take deployment into account in your list design.  You need to think about the number of deployments, or “drops”, in your army.  So why have I said “drops” rather than units?  Because there are particular rules for battalions which mean you can deploy more than one unit at once.

Battalions and deployment

Units in battalions can be deployed in three ways:

  1. All at once (rather than unit by unit)
  2. Some units, and then the remaining units individually
  3. Unit by unit

If you choose to deploy the entire battalion at the same time, you can choose to deploy some of those units in a location other than on the table if they have that option available.

What you can’t do, however, is start dropping units individually from a battalion and then try to drop all the remaining units from the battalion in one go.  Once you start dropping a battalion’s units individually, you have to keep doing so.

If you are wondering where these rules are, they are tucked away in the hints and tips section of battletomes.  So if you don’t have a battletome, it is understandable that you might have missed it.  It is also worth checking the FAQs regarding “set-up”.

Some of the “super-battalions”, such as the Sylvaneth wargroves, give you the ability to deploy your entire army in one go.  While a one drop deployment will ensure you pick who gets the first turn (depending on the dice roll to set-up first) it also means that you deploy blind and lose the ability to react to your opponent’s deployment.

Most one drop armies, are made up of several battalions within a “super-battalion”.  Therefore, it is possible for these armies to deploy in one go, say 4 drops, 7 drops, or drop all units individually.  It is worth thinking through the permutations.  If you know you can drop in 7 drops, and still finish before your opponent, drip feed your units so you don’t show your hand too early, can react, but still get choice of first turn.

You should always ask your opponent the minimum number of drops they could deploy in – with super battalions, there might be a number of answers to that question.  Could drop all, drop one battalion and dip rest etc.

In which order should you deploy your units?

The order that you deploy your units in is important.

Start with your least important or highly mobile pieces, so should your opponent deploy on the other side of the board, you won’t miss the unit or the unit can redeploy quickly.

Leave your best or most vulnerable pieces until last until your opponent’s threats have been deployed.

It is more difficult to decide when to drop your buff pieces.  If you drop them early, you can make sure that all the following units deployed will be in range of the benefit.  However, the trade-off is that your opponent will know where most of your forces are going to be.

Where to place your units?

There are a number of things to take into account when deciding where to place your units.

Threat range

What is the threat range of your units and your opponent’s units?  Threat range is a combination of movement and damage range (magic / shooting / charge and reach).

Threat range needs to be considered in conjunction with the potential damage output of your opponent’s units.  The benefits of deploying within threat range may outweigh the small amount of damage that might be inflicted.

Scenario

Of all the GHB scenarios, only Border War and Three Places of Power have objectives relevant to the first round (in that they can be captured and scored).   When deciding whether to seize those objectives, make sure you can hold them – why rush if that then means your unit is easily in charge range?  Do you want to push past and then retreat back onto the objective?

Forecast where the major battles will be – where are the objectives? Where are the gaps in the terrain? Where will their army be after the first turn?

Protect your key pieces – layers of deployment

It is important to deploy in a way that protects you from your opponent’s threats, especially if you are giving them the first turn.  This often involves “bubble-wrapping” or protecting your key units with less valuable units.  For instance, placing your low-value units in a ring at a distance so that your opponent cannot pop up some tunnelling stormfiends within shooting distance of your key pieces.

When doing so, try to consider whether you are blocking up your key combat pieces should the opponent engage your bubble-wrapping units in combat.

Therefore, you will often find yourself deploying in layers – starting with chaff units, your counter-punch units, support characters and then bows/artillery in the middle.

Synergies

As you deploy, check your support bubbles – is everything in range of buffs you need?

What if you can’t dictate first turn?

If you can’t choose who takes the first turn, how should you deploy?   All you can do is make the most of the situation.  Threaten key pieces by being aggressive yourself.  Make your opponent question whether to take the first turn.

You want to pose questions of your opponent.  The more decisions you make them take the more likely they are to make an error.

Deployment off the table

In Age of Sigmar, a number of armies have the ability to deploy units or entire battalions in locations other than the table top or in your deployment zone.   These include:

  • Sylvaneth, deploying in the trees
  • Overlords from the sky
  • Stormcast
  • Skaven in the tunnels
  • Fyreslayers, tunnelling underground
  • Gutter runners
  • Shadow warriors
  • Night runners
  • Changeling
  • Battalions – Ghoul Patrol, Wanderers, Winterleaf (can deploy through an Ophidian Archway)

Its also worth noting that some armies can summon units on to the board in the first turn, effectively gaining the ability to deploy units outside the usual deployment zone.   Summoning will be covered by a separate episode.

So what do you need to know about alternative deployments?

Most of these rules allow you to bring units on at your choice in one of your movement phases.  This will mean that for most of these units, they will have missed the hero phase, usually won’t get the benefit of command abilities or spells, and count as having moved so cannot move again.


Also, most of these units will be required to be deployed outside of 9″ of your units.  This means that these units would have a 27.8% chance of making a successful charge under usual conditions.

The 9″ rule also means that you can deny your opponent the table space required by these abilities by making sure there are no ‘pockets’ of the battlefield more than 9″ away from any of your models.  For example, position models in the centre of wyldwoods if facing Sylvaneth etc.  So if take second turn, the risk is you wont be able to get units on the board in the best places.

As I’ve mentioned, if you deploy your armies in layers, it means your important pieces are even further away from the enemy units which have just popped up but you have units which can counter-charge within easy reach.

Do you take the first or second turn?

As I’ve said, in most circumstances you will want to give your opponent the first turn.  Most armies don’t have the reach to do anything effective on the first turn (armies are 24″ apart).  By reach, I mean the ability to move and attack to influence the game.

Also, if you have deployed models off the table, then there is little point in taking the first turn.  If you deploy those reserved models in the first turn, then you will normally not have any defensive buffs up for if your opponent gets a double turn from battleround 1 into 2.

You may want to take the first turn if you are able to survive the initial double turn, and you want the double turn going into the third battleround.  For instance, in Blood and Glory if you control all four objectives, starting from the third battleround, you get a major victory.

Other things to take into account are: Can you capture an objective without overextending?  Can you neuter their key units on first turn? Do you need to use your command abilities to survive the first turn?  Do you need to risk it (i.e. are you so outmatched unless you can do something unexpected?)

Conclusion

Deployment is the game within the game of Warhammer: Age of Sigmar.  Learn to do it well and you will set yourself up for more victories.


Scenery in Age of Sigmar – how to use it better!

[podbean resource=”episode=hdaku-6cf778″ type=”audio-rectangle” height=”100″ skin=”1″ btn-skin=”107″ share=”1″ fonts=”Helvetica” auto=”0″ download=”0″ rtl=”0″]

Summary

This episode will show you how to get the most out of the six most common types of scenery in Age of Sigmar.  Each of these can improve your army and help you win games.  But scenery can also hamper your army and your plans.  We’ll tell you what you need to know!

  1. What are the kinds of scenery in Age of Sigmar?
  2. Before the tournament – check the pack and consider scenery in list design
  3. Mystical terrain
    1. When do you take the test?
    2. Do you need to take the risk?
  4. Damned terrain
  5. Arcane terrain
  6. Deadly terrain
  7. Sinister and Inspiring terrain
  8. Conclusion and key takeaways
  9. Further resources

What are the kinds of scenery in Age of Sigmar?

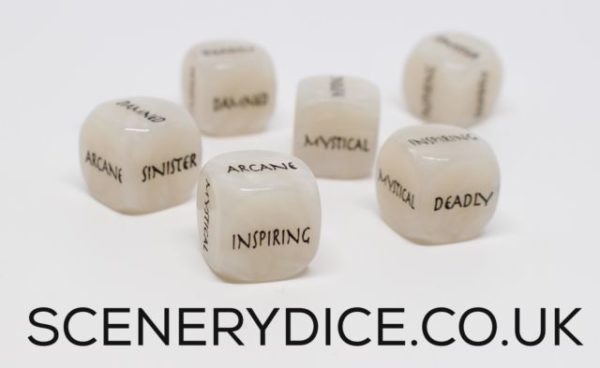
In Age of Sigmar, there are six main types of mysterious landscapes or scenery used in matched play games.  They are Damned, Arcane, Inspiring, Deadly, Mystical, and Sinister.

Additional and more specialist scenery types such as Sylvaneth Wyldwoods, Realmgates and Balewind Vortices will be the subject of later episodes.  For now, this episode will show you how to get the most out of the six most common types of scenery.


Before the tournament – check the pack and consider scenery in list design

As preliminary points consider how scenery can be taken advantage of in your list and check the pack for any variations or house rules.

In a standard matched play game, and most tournaments, you will roll for mysterious terrain before sides are chosen.  A great way to do this is with Scenery Dice.  You can then mark with the dice or another token.  Other tournaments will have rolled the terrain before the start of the tournament and fixed the terrain festures for the entire tournament.

The other point to check is whether there is a house rule about when the effects of terrain occur in the hero phase.  By default, they happen when chosen by the controlling player.  You can decide whether to roll before or after casting spells, using command abilities or other steps.  As we’ll see there are circumstances where one order is more beneficial than another.  However, some tournaments house-rule that you must take the effects of terrain at the start of the hero phase.  So check the pack in advance.


Mystical terrain

roll a dice in your hero phase for each of your units within 3″ of this terrain.  On a roll of 1 the unit is befuddled and can’t be selected to cast spells, move or attack until your next hero phase.  On a roll of 2-6 the unit is ensorcelled, and you can re-roll failed wound rolls for the unit until your next hero phase.”

As you can see, Mystical terrain can either provide a significant benefit (re-rolling failed wound rolls) or cause your key combat unit or caster to stand around ineffectually.   If your unit is befuddled, then it is also at significant risk of being charged and taken out in combat as it can’t defend itself.

The effects of Mystical terrain are even more significant given that the effect lasts until your next hero phase – so if your opponent wins priority for the next battle round, and gets two rounds in a row, then you are potentially befuddled for that entire time.

Mystical terrain is most useful on units which:

  • get bonuses on their wound rolls (such as Grave Guard); or
  • have large range – which means that if they are befuddled for a turn, the impact on their role in your list is more limited than for a less mobile unit.

Therefore, there are two key considerations: when do you take the test? and do you need to run the risk?

When do you take the test?

Assuming there is not a tournament house rule, you get to choose when in your Hero Phase you test for the effects of Mystical terrain.  Whether you choose to do it before or after other effects depends on your army and the role of the unit potentially subject to the test.

If the unit is a caster or your general, you will probably want to roll for mystical after you have achieved everything else you want in the phase.  Cast your spells, use your command ability and then roll.  Or if you don’t want to take the risk of being befuddled, use a Hero phase move to get your unit our of the way first.

However, if you are going to be applying a lot of buffs to a main combat unit, then you will want to take the test first before applying the buffs.  As Terry Pike reminded me over Twitter, there is no point in buffing a unit to make it fly, increase its armour save, give it +1 to hit, whip them, add run and charge for it to just then sit there befuddled.

Do you need to take the risk?

Consider the game situation.  Do you need to take the risk that your unit will be befuddled?  Are you winning or losing?  Do you need to push?  Does your unit need a boost in combat effectiveness in order to take out a target unit?

Mystical terrain can have a massive impact on the game.  Just make sure you use it wisely.


Damned terrain

“if any of your units are within 3″ of the terrain in your hero phase, you can declare that one is making a sacrifice.  If you do so, the unit suffers D3 mortal wounds, but you can add 1 to all hit rolls for the unit until the next hero phase.”

Damned is great, especially if you have combat units with the ability to regrow wounds (think Sylvaneth Kurnoth Hunters) or resurrect models (again Grave Guard).

Ideally you want units that can take 3 mortal wounds and not lose effectiveness, or the effectiveness is greatly increased such that the benefit outweighs the cost of losing a few wounds (for instance, 30 Bloodletters).

In terms of timing, take the Damned test first, then cast your spell to regrow or heal your unit.


Arcane terrain 

“add 1 to the result of any casting or unbinding rolls made for a wizard within 3″ of this terrain feature.”

Arcane is a perfect piece of terrain for boosting your casters that can also be stacked with other items such as Ranu’s Lamentiri to improve your chances a spell will be cast.

While all casters will benefit, the greatest uses are for:

  • reducing the risk of failing spells with a low casting value or essential spells for your army; and
  • spells that get boosted by succeeding by a certain amount – Teclis for instance.

Scenery in Age of Sigmar


Deadly terrain

“roll a dice for any model that makes a run or charge move across, or finishing on, this terrain.  On a roll of 1 the model is slain.”

Deadly terrain can hurt.  All of your models, regardless of size or battlefield role, can be lost on the roll of a 1 – an 17% chance… ouch!

A local at a recent New Zealand tournament managed to lose Gordrakk and 4 brutes all in one turn on the same piece of deadly terrain.  Needless to say it was pretty much game over then.

There is no limitation or exception for monsters, heroes or behemoths and no saves of any kind are available.

The only exception are Grot Spider Riders who have a Wall-crawler ability that allows them to ignore terrain of all kinds.

Place a hero or unit in to gain the extra cover save bonus and if something changes them then they have a chance to lose those models.

If you do need to go near Deadly terrain, the key to remember is that it only takes effect if the model runs or charges through.  Standard moves, hero phase moves and pile-ins are all fine.  So, if you have to charge a unit that is stationed in deadly terrain, send one model in within ½” (all that is necessary to complete the charge) and then have the rest of the unit outside the terrain and pile-in.


Sinister and Inspiring terrain

The final two categories, Sinister and Inspiring, both effect a unit’s bravery.

For Sinister – “any of your units that are within 3″ of this terrain feature in your hero phase cause fear until your next hero phase. Subtract 1 from the Bravery of any enemy units that are within 3″ of one or more units that cause fear”

For Inspiring – “add 1 to the bravery of all units within 3″ of this terrain feature”

By altering a unit’s Bravery, one more or one fewer model is likely to run away from a Battleshock test.    Use a counter to remember which of your units causes fear.  NB: the fear effect from Sinister terrain does not stack so you get no additional bonus if 2 fear-causing units are within 3″ of an enemy unit.

However, Bravery is not just relevant for Battleshock tests.  There are a number of effects and abilities within the Death faction which are tied to a unit’s Bravery.  For example:

Lists which seek to maximise some of these effects (colloquially “bravery bomb” lists) will be the subject of a later episode.

Conclusion and key takeaways

The key point to take away is that scenery and terrain can have a significant impact on your game and can give your army a great boost.

When you are choosing table sides, and how you deploy your forces, take into account what kinds of scenery are on the table and how you can put them to best use.   Weigh the risk and reward of cover and the terrain effects to get the most out of your army.

Further resources


Tournament Play Tips for Age of Sigmar – finish your games and have fun!

[podbean resource=”episode=5jy6r-6cba87″ type=”audio-rectangle” height=”100″ skin=”1″ btn-skin=”107″ share=”1″ fonts=”Helvetica” auto=”0″ download=”0″ rtl=”0″]

Summary

This episode provides tournament play tips for Age of Sigmar.  These practical tips will help you finish your games in the time allotted while still having fun.

From the outset, I would like to acknowledge that this episode builds on and reflects on previous podcasts and blog posts by Heelanhammer, Tronhammer, Nico and Jabber Tzeentch.  I hope this accurately captures their thoughts and mine in one short package.

  1. Completing your game on time – the social contract of tournaments
  2. List writing – can your army finish games?
  3. Practice, practice, practice – know your army?
  4. Practical tips for the table
  5. Conclusion
  6. Further Resources

Completing your game on time – the social contract of tournaments

For me timely play is a fundamental part of the social contract that we as gamers enter into when we turn up at the table-top.  That contract includes, in my view, a commitment to complete the game at a reasonable pace with an equitable split of time between the two players.  Most tournament games are between 2 and a half and 2 and three quarters long for 2,000 points.   It is both players’ responsibility to manage their time wisely.

Avoid the sour taste of a rushed or incomplete end to the game

No one wants to feel rushed through their decisions, but you also don’t want to feel that you are being slow-played (either deliberately or inadvertently).

If players do not use their time wisely, then you can find that you are left with the difficult decision of whether to try to fit another battle round in before dice down, play into a lunch break, or to rush through turns.  All of these can leave a bad experience, especially if you make crucial mistakes because you are rushing.

Armies are impacted differently by time – Some armies win in 2 turns, others need 5

Also different armies are affected by time in different ways.  Lists which do most of their damage in the first one or two turns are not affected if the game only gets to turn 3, while some grind or highly mobile lists which are dependent on capturing objectives late once an opponent are whittled down, need all 5 turns to execute their strategy.

I’m not an advocate of allocating a certain time to each player, and then enforcing those limits with chess clocks.  For me that puts an undue focus on time restrictions and ignores the realities that some lists take longer to move, shoot, fight etc than others.

Being time efficient while still having fun with your opponent

Efficient play does not require you to be rude or unengaging with your opponent.  Nor should it discourage banter and enjoying the narrative of the game as it unfolds.  Warhammer is a social game, even at the highest competitive levels.

I like to consider an analogy with golf.  In golf, the premise is that you take the time you need to take your shot, but you move efficiently at all other times so you don’t hold up play.  You don’t stand on the green to mark your card, you do it while walking to the next tee or waiting to tee-off.  While your opponent is taking their shot, you might be moving into position for yours in anticipation etc.

So what does that mean in practice for AoS?


List writing – can your army finish games?

At the list writing stage, think about how your army plays.  If you are running the Kunnin Ruk from Bonesplitters, and have 500 shots a turn, come prepared with enough dice, or perhaps don’t bring the list at all if you don’t think you can get through a game in time.


Practice, practice, practice – know your army

Nothing beats experience with an faction or a list to speed up play.

Read and re-read the rules.  To save time in game, especially with the move to electronic battletomes, scrolls, FAQs and rules, you may want to have a hard copy cheat sheet to act as a helpful reminder of what you need to do in each phase, including synergies, combinations and rules.  An example can be found here.

With my Sylvaneth army I also have a separate one-pager which has all the rules for my army (including any FAQs I rely on) – it’s a useful reference for me and I can share it with my opponent.  The one I used at my last tournament is here.

Play practice games with your tournament list.  Perhaps think about how your army will deploy in each scenario in advance – of course you will have to tailor for your opponent, but the changes will not be dramatic – know how many drops you have in your army.


Practical tips for the table

So what should you do at the event?

Pre-game: Moving your army and explaining your force

Think about how you will carry your army as you move from table to table – an open top box lined with magnetic sheet can be far quicker and easier to move models than a foam carrying case which is more ideally suited to long-distance travel.

At the start of the game, introduce your army to your opponent and offer to explain anything then.

Deployment

Try not to deploy your units from foam – get the units out onto a side table (or the middle of the game table) before the game even starts.

Movement

Consider using movement trays for early turns.  I also use movement trays for packing models in and out of my box.  When removing casualties during the game it is easy to put them back into the tray and into your box, ready to move to the next table.

Pre-measure a charge in the movement phase – agree the required amount in advance.

There is no need to agonise over positioning when charging, for example, when you get to make a 3″ pile in during the combat phase.

Also in relation to movement, and depending on your opponent’s view, you may way to agree that you don’t need to measure for every model – move one first and keep the rest in line.  You may also want to combine destruction or other hero phase based moves and runs in one go for standard units.  It is normally not a good idea to do this for wizards, heroes or buffing characters where range (and their board position in a particular phase) matters.

Dice etiquette

Avoid unnecessary disputes – narrate your actions as you go so there is no confusion.

Have your dice ready – I always have piles of 10 in different colours, so I can easily pick up how many I need – don’t mix sets so there is no confusion over whether symbols are on 1s or 6s.

Roll in a set spot or clear space near the dice – don’t spend time hunting for dice.

Rolling attacks together if stats and rules are the same

Tokens and cheat sheets

Use markers and tokens – scenery dice, buffs, wounds etc.  I can’t really stress enough how much you need tokens. There will be so many synergies, rules and abilities in play affecting different units that you will want to keep track of them somehow.

Save time looking up rules by having a one-pager that contains all your rules in one place (example here).  Or a prompter to remind you of what you need to do each phase (example here).

Final points

Think in their turns – put your phone down and prepare that you might win the roll-off in advance.

Leave breaks for after the game – bathroom, drinks, smoke (or if you must, do it in the opponent’s movement phase).

If running short of time – discuss, even out turns, or could extrapolate out last turns.


Conclusion

So those are just some of my thoughts on efficient tournament play.  Let me know what you guys think.

As always, you can find on me on Twitter at @antipodean7 and other social media platforms.  If you enjoy the episode, please subscribe and leave an iTunes review.


Further Resources

How to write a winning army list for Warhammer Age of Sigmar

[podbean resource=”episode=jw63m-6cb359″ type=”audio-rectangle” height=”100″ skin=”1″ btn-skin=”107″ share=”1″ fonts=”Helvetica” auto=”0″ download=”0″ rtl=”0″]

So our first episode is on how to write a winning army list for Warhammer Age of Sigmar matched play.   We want to help you write better lists so you win more games!


Summary – what makes a winning list?

Proper list design is fundamental to success in matched play.  In this episode we will cover:

  • How do you want to play?
  • How do you win?
  • What are the tools your army needs?
  • What do you need to deal with?
  • A worked example


How do you want to play?

How you want to play is important.  You will only truly be successful playing an army that you enjoy playing.  Many, perhaps the majority of players have a style of army that appeals to them and they do better with that type of army.  You may find you are most suited to:

  • an alpha strike combat list;
  • a conservative, resilient grind list;
  • A horde list
  • A counterpunch list (which takes an initial blow and then hits back hard)
  • a highly mobile avoidance list that harries the enemy while picking and choosing its battles;
  • A gunline/bunker list which unleashes volleys of arrows, lead or aetheric fire while delaying the enemy from engaging;
  • a mixed arms list which allows you to compete in all areas of the game and against all-comers.

Think about how you want to play.


How do you win the game?

When designing a list you must understand what is required to win i.e.  to secure a major victory and achieve any secondary or tertiary objectives that may be in play.  This varies a great deal between tournament packs and between various battleplans.

The General’s Handbook scenarios emphasise bodies – large resilient units which can take and hold objectives.  With the exception of Three Places of Power which relies on heroes, most of the Handbook scenarios require you to outnumber your opponent at objectives on the board.  Now, while pure brute force and damage output alone may allow you to blow an opponent off an objective, you will still need a number of sizeable units to seize objectives.

Mistakes to avoid are having elite melee units or hammer units on guard duty on home objectives when they could be involved in the pivotal combats elsewhere.  For example, if your cheapest unit is a pair of Mournfang, then you will have a lot of idle points in a typical Battleplan.  Cheap Battleline units are well suited to guarding objectives as are ranged units (Judicators are perfect) that can hold objectives while still contributing damage.

Individual tournaments may introduce new scenarios or other objectives, requiring a different emphasis in list construction.  The South Coast GT and AdeptiCon are two prominent recent examples.  The SCGT Pack, for instance, placed greater emphasis on having a durable general and lots of heroes for the secondary missions.  It is always important to read the pack and, if you can, try out some of the scenarios in advance.

Depending on the size of the tournament, it may also be worth considering what the relevant tie-breakers are – are they kill points (which emphasise an offensive smash face list)?, secondary objectives? sports votes? Painting nominations?

Packs also vary in terms of the constraints on the list – is it a single 2,000pt list, or do you have a sideboard or choice of dual lists.  Are artefacts/traits and weapon options fixed or can they be changed between games.  IF they can be changed, that opens up the possibility that you can cover weaknesses in particular matchups or you can tailor to your opponent by, for example, picking a spell that will work on horde units.


What do you need in your army list?

There are five dimensions you should consider when designing a list:

  • Reach – the ability of your army to influence the game – this can either be through movement (think Destruction moves or teleporting Stormcast) or through threat range (think Skyfires moving 16″ and shooting at 24″ range or Kurnoth Hunters with bows which can deploy into a Wyldwood and shoot 30″).  It is always important to consider both the ability of the unit to move, and the range of any weapons they hold or spells they can cast;


  • Control – the ability to influence board space, both through having large enough units to cover board space and objectives, but also sufficient threats to dictate how and where your opponent will choose to deploy and move;


  • Resilience – can your army absorb an alpha strike or the turn one loss of a key unit?  can it survive a double turn?  the ability to endure and have redundancy in your list is key – how many wounds do you have? what are the armour and ward saves that protect those units? Can you heal wounds or add models back to units?;


  • Damage output – can you do enough damage (either normal damage or mortal wounds) to take down key threats before they hurt you?  Could you take out a Stonehorn or Durthu or Gordrakk before they start wrecking havoc in your lines?  This requires assessing several factors – the volume of attacks and likelihood that the damage will get through i.e. rend; the concentration of damage output (one Mourngul can squeeze into a smaller area than 15 Brutes, even if the Brutes have a higher theoretical damage output they may not all get into combat); whether the damage output comes from a good stat line (Hunters with Scythes) or by stacking buffs and synergies onto a mediocre unit (60 grots with sneaky stabbing and bellowing tyrant).


  • Risk –  does your list have bad match-ups, either with particular opposing armies or scenarios?  are the hard or soft counters to your army commonplace in the meta or are they rare?  how reliable is your list at achieving its objectives? Will it win 5 games at a tournament over a weekend?

Do the units you have picked meet these criteria?

It can be useful to assess the battlefield roles of units available to you in your chosen faction or alliance.  Some units will be effective hammers (think Retributors, Stormfiends, Morghast Archai), others anvils (Plaguebearers, Dryads  or Vulkite Berserkers) and some will be most effective as screens, chaff or flak units (Skinks, Clan Rats, Marauders etc).

The final filter is the points cost for the units in your army – is the unit providing its desired role at an efficient points cost, or can you achieve the same outcome at lower points cost elsewhere?


What do you need to beat?

Once you know how your army will work and achieve victory, you need to think about how your opponent will seek to undermine those plans.

What lists might you face?

The main threats that you are likely to face are:

  • Cross-map charges/teleporting – Destruction, Stormcast Eternals, Sayl, tunneling Fyreslayers, Stormfiends
  • Mortal wound spam – Clan Skryre, Disciples of Tzeentch, Bloodletter bomb
  • Gunlines with a 30+” threat range – Mixed Order with Hurricanum, Stormcast Aetherwing force, Skyfire spam
  • Highly armoured units – Sylvaneth, Fyreslayers, SCE
  • High model count armies – horde and chaff armies such as Moonclan grots, FEC, Skaven
  • Synergistic armies that rely on the abilities of a number of support characters to be effective – Savage Orruk Big Boss, Tzaangor Shaman, Necromancer.

What are the local lists in your area?

The “meta” or universe of likely lists that you will face at a tournament or event changes as new books and units are released, or points are changed.  This dynamic is part of what makes Warhammer so interesting to play.

What works against these lists?

Each of these will be the subject of individual later episodes, but in short, you’ll want to consider the following to counter these threats:

  • Cross-map charges/teleporting – chaff screens and redundancy;
  • Mortal wound spam – chaff screens and redundancy;
  • Artillery that shoot 35 inches – reach, movement, defences against shooting such as Protectors, Fulminators;
  • High armoured units – rend, mortal wounds;
  • High model count armies – high damage output, bravery/battleshock debuffs, modifying bravery;
  • Synergistic hero armies – sniping characters.

Conclusion

In the end, nothing beats testing and playing with your proposed army list.  If you are testing a new list, avoid the temptation to tweak it after every game – try running the same list through several games and you will have a much more accurate view of how it plays.


Further reading

For further reading, check out:

Next episode

Our next episode focuses on efficient tournament play.  How can you make sure your games finish on time without ruining all the fun?  Find it here.

Welcome to AoS Shorts

[podbean resource=”episode=n8wvd-6cb354″ type=”audio-rectangle” height=”100″ skin=”1″ btn-skin=”107″ share=”1″ fonts=”Helvetica” auto=”0″ download=”0″ rtl=”0″]

Welcome to AoS Shorts, a series of podcasts, videos and blog posts on strategy for Warhammer: Age of Sigmar.  This series will help you get better fast.

Just what you need to know – bite-sized strategy

There is so much great information out there in the AoS community on strategy and tactics, but it is largely buried in 100 page forum threads, 3 hour podcasts or hundreds of hours of video.  Our aim is to distil this information for the time-poor gamer.

Each show focuses on a key AoS topic, such as list design, deployment, and scenarios,  and is accompanied by diagrams, tipsheets and a blog post for you to digest or refer to later.  We hope that these will be a useful resource for those of us that may not get to play regularly, but don’t want to spend the first two games of our next tournament remembering how to play our army and the game.

Who are we and where to find us?

We are matched play gamers from New Zealand.  I’m your host, Dan or @antipodean7 on Twitter. Working with me are James, Shaun and Tim, the former and current NZ #1 matched play gamers, and Andy who is providing graphics and design.

The information in these episodes is of course based on our own views and opinions.  Feel free to challenge and engage with us.

You can find me at @antipodean7 on Twitter or feel free to comment on the episode posts on Podbean, Facebook or TGA.  If you like what you hear it would be great if you can drop us a review on iTunes – it will help us reach more people.

Well that’s it for the introduction – on with the series.