
This Iron Golems warband guide is the first in series of articles providing all the advice you need to make the most of your Warcry warbands. You can check out the rest of the Warcry warband guides here.
Summary: WE CREATE WAR!!!
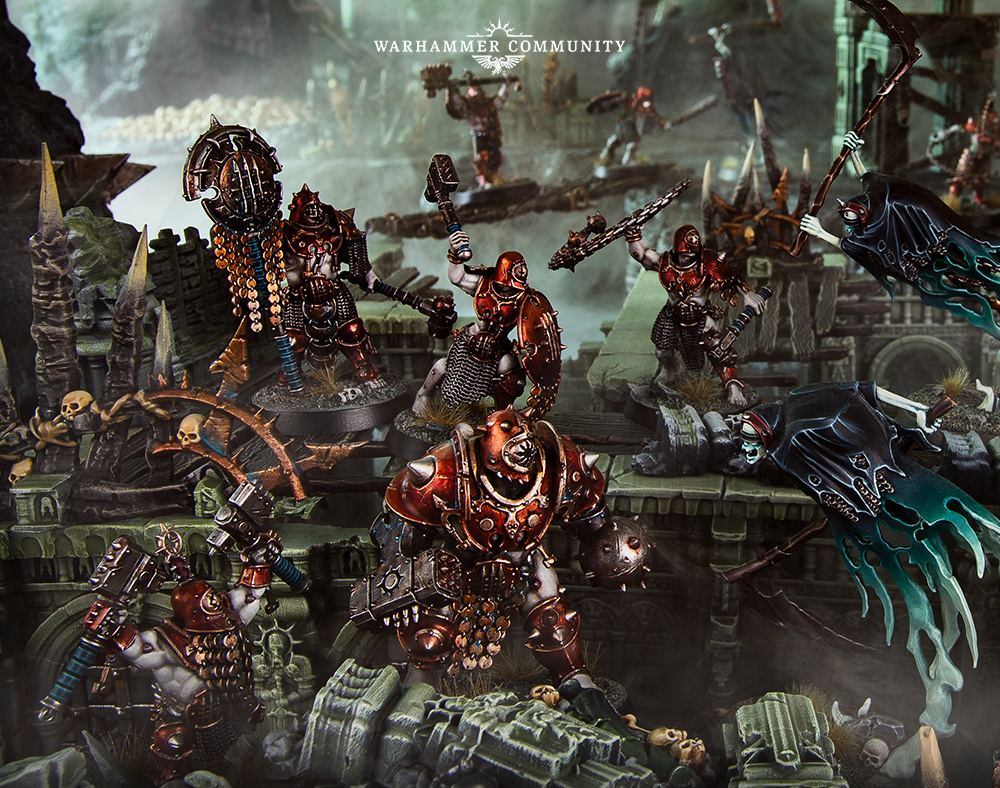
Forgers of iron and steel, the Iron Golems are natives to the realm of Chamon and proud masters of their art. The durability and strength of their arms and armor are matched only by their unshakable discipline and imposing stature. Foes of the Iron Golems find themselves smashed to bitter ruin, and their precious equipment smelted down to form slag monoliths to mark the Golems’ victory. These iron-shod warriors will stop at nothing to achieve their destiny, to serve as the honored smiths for the Varangard themselves.
Pros
- Durable and Tough – What you see is what you get with these warriors. They’re big, they’re armored and they have the wound counts and toughness to match.
- Surges of Violence – On top of having high base damage and strength, the Iron Golems have several abilities that push their damage output higher.
- Unit Diversity – The Iron Golems have an excellent range of units to select from when building the warband. Don’t hesitate to pick up the double box from the Slaves to Darkness range.
Cons
- S L O W – The Iron Golems are very slow, even when measured against the below average warbands. You will be burning doubles early on just to reach key engagements.
- No Range – Calling the Throwing Bolas they have access to “range” is a stretch. The Golems have no way of genuinely threatening the enemy at distance. They are susceptible to kiting (being hit from range by an enemy that can keep its distance).
- Underwhelming Threat – Your elite threat unit, the Ogor Breacher, is very much outclassed by his cousins in other warbands. Living Battering Ram isn’t very useful if you cannot catch anyone.
Mustering your Iron Golems Warband
The Iron Golems come in the starter set, there is a good chance you already have them. If not, picking them up second hand new-on-sprue is very easy.
We’d recommended you pick up a second set, or even the Slaves to Darkness double box, because straight out of the box the warband is not particularly great. The moment you are able to it is worth replacing the Ogor Breacher with two Prefectors, and have the option to have more or less Iron Legionaries with shields.
Painting your Iron Golems
Remember when painting these that if you want to apply the contrast paint Flesh Tearer over metallic to get a shining red luster you HAVE to use Stormhost Silver. Leadbelcher simply isn’t bright enough to get the effect Games Workshop display on these models. Fortunately, Stormhost Silver goes very smoothly over Leadblecher and the process is a fast one. For more guides, check out Mengel Miniatures, Tale of Painters and the Warhammer TV video.
Iron Golems Unit Breakdown
For the purposes of breaking down the units and categorizing them effectively, these reviews will list units as being one of the following:
- Leader – A leader choice for the warband. A Warcry warband must include one of these, and cannot include more than one.
- (Elite) Threat Unit – A higher-price unit that dishes out heavy damage. Also comes in the Elite variety, which a warband will usually only be able to afford a single one.
- Support Unit – A model whose use is tethered to an ability, usually a Triple, that boosts the effectiveness of themselves and those around them.
- Infantry Unit – Middle of the road, these units are reasonably affordable in exchange for a baseline unit that can hold its own passably.
- Chaff Unit – Cheap, spammable and here to either screen or hold objectives. Can usually be buffed, usually is not cost effective to do so.
Dominar (Leader) – 175pts

Disciplined leaders of the Iron Golems, they lead from the front and crush their enemies to paste with mighty two-handed mauls. Brutally practical, nothing distinguishes the leader from his line troops but his strength and will to lead.
The Dominar is the only leader choice available to the Iron Golems. He is a respectable leader, as leader profiles go, but doesn’t synergize as well with his warband as others. The Dominar has a reasonable points cost and in a straight one-on-one fight the Dominar is likely to pulverize his opponent.
His strength will be adequate for dealing with most if not all threats. However, the Dominar will need to use his Spine-Crushing Blow to make sure he wounds on 3s or better against a Monster or Cavalry. On top of Spine-Crushing Blow, the Dominar has Lead with Strength, allowing him to follow up a successful kill with a bonus move OR attack. The enemy will be less keen to charge him with chaff knowing he could kill it in one attack, bonus move into another unit then attack that too with his last activation.
Ogor Breacher (Elite Threat Unit) – 235pts

A monster shod in enough armor to cover a Dracoth, it cannot be said where the enslaved Ogor ends and the weapon begins.
The biggest lad and (unfortunate) poster-child of the warband. The Ogor Breacher is a breathtakingly cool model, but that’s where the awe ends. He only has 2 attacks base on his only weapon profile. The weapon’s high strength and damage (4 / 8) aren’t enough to carry the fact that just under half the time, one of them will likely miss.
Coming in at 30 wounds with toughness 5 sounds impressive until you realize it’s the same as a Spirit Host which costs less and does more. The Breacher’s best case scenario in-game is squatting on an objective you don’t want to lose. Instead, you could swap him out for two Prefectors.
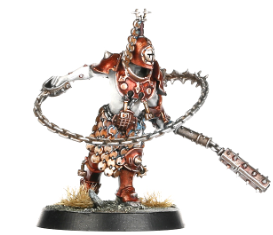
Signifier (Support Unit) – 120pts

Signifiers bear the proud insignia of the Iron Golem, and the Legionaries fight all the harder in it’s presence.
The icon-bearer of the warband, the Signifier brings all of his Iron Golem flair (high toughness, decent damage output) to the noble profession of carrying the group’s banner. The Signifier is, dare I say it, an auto-include for the warband, and will always make up his points cost over the course of the game.
Stand Defiant, his unique Triple, boosts the Toughness of all fighters within 6” by 1. So even the lowest toughness in the warband will be a whopping 5. Normally an ability like this would be balanced by the icon-bearer being squishy (see the Dreadwarden in the Nighthaunt warband). But that just isn’t the case here, the Signifier is just as combat competent as any other Iron Golem unit, and benefits from his own ability.
Prefector (Threat Unit) – 125pts
(Alternate build for Signifier)
This model is an alternate build for the Signifier (guy with the icon). The Prefector is ideally built from your SECOND set of Iron Golems, as you definitely want a Signifier. Catch is, you definitely want this guy too.
The Prefector is similar to the Dominar but not a leader. He even has an extra point of critical damage (assumedly because time not spent leading the warband has been spent on his golf swing) as well as access to Spine-Crushing Blow. This means for the low cost of a Double you can have a 125pt unit pulverize the enemy leader.
The Prefector is a fantastic choice for any Iron Golems warband.
Drillmaster (Threat Unit) – 125pts
Tasked with keeping order in the ranks, these skilled fighters are equally competent at punishing the foe with astonishing displays of violence with their brutal flail.
Calling this one a Threat Unit comes with a caveat. The warband’s Quad is tethered to this unit, which is where it gets the Threat designation.
Whirlwind of Death is identical to a few other abilities like Reaped Like Corn for the Nighthaunt, where the unit assigns damage equal to the ability value to every visible enemy within 3”. This is pretty neat in the Iron Golems because the Drillmaster:
- is the cheapest unit to have access to such an ability; and
- can be buffed by the Signifier to make sure wading into the middle of a fight doesn’t see it smashed into a metallic red paste.
I’d always take one of these, however begrudgingly, as transporting this model is a real pain.
Armator (Infantry Unit) – 90pts

The Dawi Zharr have found a place for themselves in the ruthless societies of Chaos, forging tools of murder to earn their keep in the warband of the Bloodwind Spoil.
Well well, a Chaos Duardin. It excels at the two things Duardin do traditionally, moving slowly and being hard to kill. He’s got more wounds than the rest of the Chaff and Infantry Units, but he’s also the slowest of the warband at a meagre 3”.
He’s got no specific abilities and he isn’t particularly cheap for what he provides. So at the risk of angering the Chaos Duardin lobbyists I have to recommend dropping him in favor of another Iron Legionary with Shield.
Iron Legionary (Infantry Unit) – 80pts

Line-troops of the Iron Golem, the regimental discipline displayed by the Iron Legionaries is a rare sight on the hectic battlefields of the Eightpoints.
Calling this model a Chaff Unit would not be fair to it’s profile. The sword-and-board soldier of the Iron Golems is a fantastic spend for points coming in at Toughness 5 and a respectable wound count. With Stand Defiant (Toughness 6) even the average monster won’t be able to wound it easily.
They have no special abilities unique to them, but they can Throw Bolas if they want to, not that I recommend it.
The best use for an Iron Legionary is body-blocking for a Drillmaster or Signifier, or standing in a door and refusing to cooperate with the enemy’s requests for entry.
Legionary with Bolas (Chaff Unit) – 65pts

Heavy chains with weights attached are potent tools in making it easier to pin them before smashing at them like a blacksmith’s anvil.
The cheapest fighter in the warband. He trades the extra point of Toughness for an extra range 3 attack with the chain bolas. This model IS worth taking, but not for that extra attack.
At 65pts you don’t have anything cheaper here to line up in front of a threat to die at little inconvenience to yourself, so their designation as Chaff is well-earned. They’re worth burning a Double on to run up the table and cap an objective early, even if they die not long after support arrives.
Legionary with Twin Hammers (Chaff Unit) – 70pts
Alternate Build for Legionary with Bolas
This Legionary is the same as the one with Bolas, but trades the Bolas for another Hammer, which gives it an extra swing with its existing profile. Take the unit above instead unless you’re going for model diversity.
On the bright side, this fantastic sculpt makes for an easy arm swap with the Iron Legionary with Shield if you’re looking to give your double-ups some variety.

Iron Golems Ability Breakdown
We now breakdown each of the abilities of the Iron Golems.
Throw Bolas
Throw Bolas (Double). Select a visible enemy within 6” and roll two dice. For each 4 or 5, they take 1 damage, and for each 6 they take damage equal to the value of the ability.
Regrettably forgettable. Using this when you could be running somewhere or tenderizing the enemy with Spine-Crushing Blow will always be a waste. Fine if moving isn’t a necessity and you only have a Double in the pool, but there will almost never be a situation where this is the go-to.
Spine-Crushing Blow
Spine-Crushing Blow (Double, Dominar and Prefector Only). Add the value of the ability to the strength characteristic of the next attack action made by the fighter.
Fantastic Double for smashing your way through a particularly high toughness opponent. This can be used by both the models who have the enormous two-handed maul, appropriately. Normally abilities like this aren’t particularly useful as they tend to give HALF the ability’s value as strength, but this one gives it as a full benefit, and is also something that the warband actually needs to kill high-toughness foes like a Gutlord.
Lead with Strength
Lead with Strength (Double, Dominar Only). If the user has successfully taken down an enemy fighter this turn, it may make a bonus Move or Attack action.
The trickiest ability to get right in the list, and the most significant when done properly. To master this ability, you have to have a good understanding of what your Dominar can realistically kill with a single activation, as the majority of the time you will need to move into range first.
Get off a kill, then move into range of another fighter effectively holding them in place so another Golem can come up and fight them, fight like the Legionaries the fluff purports you to be.
Living Battering Ram
Living Battering Ram (Triple, Ogor Breacher Only). The next time the fighter finishes a move activation within 1” of an enemy, assign damage equal to the value of this abiltiy to a single fighter within 1”.
This is a Triple. I know, I have trouble believing it as well. This is almost never going to be useful, just save a Wild Dice and use a Quad on Whirlwind of Death instead.
The Ogor Breacher is too slow to make effective use of this ability, and you will almost always get a better spend out of Stand Defiant or Spine-Crushing Blow. Situational at best, a waste of dice at worst.
Stand Defiant
Stand Defiant (Triple, Signifier Only). Add 1 to the Toughness of any fighters within 6” of the Signifier for the rest of the battle round.
God I love this ability. In an already tough warband, this ability is your answer to strength steroid abilities and high strength units like Elite Threats and Monsters.
Pop this bad boy off and the enemy will be wounding you on 4s minimum and 5s the majority of the time.
Laugh as the puny creatures bounce off your rippling muscles and armor (but do watch out for the Splintered Fang).
Whirlwind of Death
Whirlwind of Death (Quad, Drillmaster Only). Assign damage equal to the value of this ability to all visible enemy fighters within 3” of the user.
As quads go it’s not terribly inventive, but it certainly gets the job done. This ability is worth putting aside an optimistic Wild Dice or two for just in case the enemy piles a bunch of chaff units on an objective. You can head in there and spin them right round (baby right round) till they’re cleared away. Also fantastic for supporting a nearby fight while giving yourself an advantage. It’s basically a short range bolas that doesn’t need to roll to hit.

Iron Golems Strategy & Tactics
The Iron Golems are pretty straightforward on paper, a blessing given they are a starter set warband. Exactly per the pros and cons, you are in for games where the majority of the time you are:
- tougher than the enemy and hit harder than them; and
- slower than the enemy and they can dance around you.
Warcry is a game of “Fast-Paced Skirmish Combat”. This warband does the Skirmish Combat thing pretty well, but it certainly is not fast-paced. You’re slow, no two ways about it.
We will break down the portions of a game step by step to see how this can be mitigated.
Iron Golems Roster Building
When I said the start, I meant the very start. You have no “fast” options, so we won’t bother trying to mitigate that here. While the warband straight out the box is fine for fun, we want to optimize a bit here so if you haven’t gotten another set or two yet, do that.
The Iron Golems are hardy and killy, so my list takes that to its extreme as a mitigation to underperforming in other areas. Below is my list of choice.
Aiden’s Iron Golems – The Sunforged
Shield
- Dominar (Leader)
- Signifier
- Iron Legionary
- Iron Legionary
Hammer
- Prefector
- Drillmaster
- Iron Legionary
Dagger
- Prefector
- Iron Legionary
Dead on 990pts. To build this list you will need the Slaves to Darkness double box.
The Shield has to contain at least a third of the warband, but beyond that it’s near impossible to split into factions that are optimized for every mission. So you’re best off making sure that each group can handle itself, and make sure your leader is going to be well insulated from being tied up and killed immediately by speedy warbands.
The strength of this list is in the undercosted Prefectors, who are nearly carbon copies of the Leader unit while being dramatically cheaper.
The whole warband has massive toughness across the board, and a single use of Stand Defiant will cause the enemy to bounce off of anything in the warband.
Deployment
Be aggressive. Put your stuff as close to the objectives as your deployment allows. If this means risking your leader, that’s why there are two Iron Legionaries with him. Let them shield up and pop off Stand Defiant to make sure you can waste the enemy’s alpha strike hit.
In “Kill the Enemy” type scenarios, don’t be afraid of the enemy starting. They realistically can’t kill you outright like you can to them (again, caution of Splintered Fang).
The Game
We have already covered what the warband can and can’t do, but now we have to put it into action against an enemy. A few snapshot points.
- Keep an eye on how many Wild Dice the enemy has. If you are playing against the Splintered Fang and they have spent all their abilities, its time to go in on as many fights as you can. Without abilities, they won’t be spamming Poisoned Weapons to ignore your toughness and melt your skin off.
- Golems are durable so you can afford to go in on fights on a 1v1 basis most of the time provided you’re squaring up against an evenly-costed opponent and they don’t throw out a Spinning Somersault Strike.
- Know how far the enemy can move if they’re going second. You don’t want them to get a chance to fight you without you getting to fight them as well. To make the most of this, don’t hesitate to move with a Golem once, then pop a wait. Let the enemy come to you or force them into the same behavior.
- Exploit the 3” range of bolas weapons and the Drillmaster wrecking ball. Move to 3” out from an enemy and strike them with the bolas, forcing the enemy to waste a move action before getting to hit you.

Conclusion
The Iron Golems are a rewarding warband when played well, they just require time and practise. There really isn’t a lot more satisfying than using a muscular armor-shodden Adonis to absolutely dumpster some (other) chaos-addled weirdo with an oversized blacksmith hammer.
Play around your opponent’s speed, pick your engagements and close in on the objectives to hold them while you weather the enemy’s blows. Go forth and Make War!
Leave a Reply
You must be logged in to post a comment.