
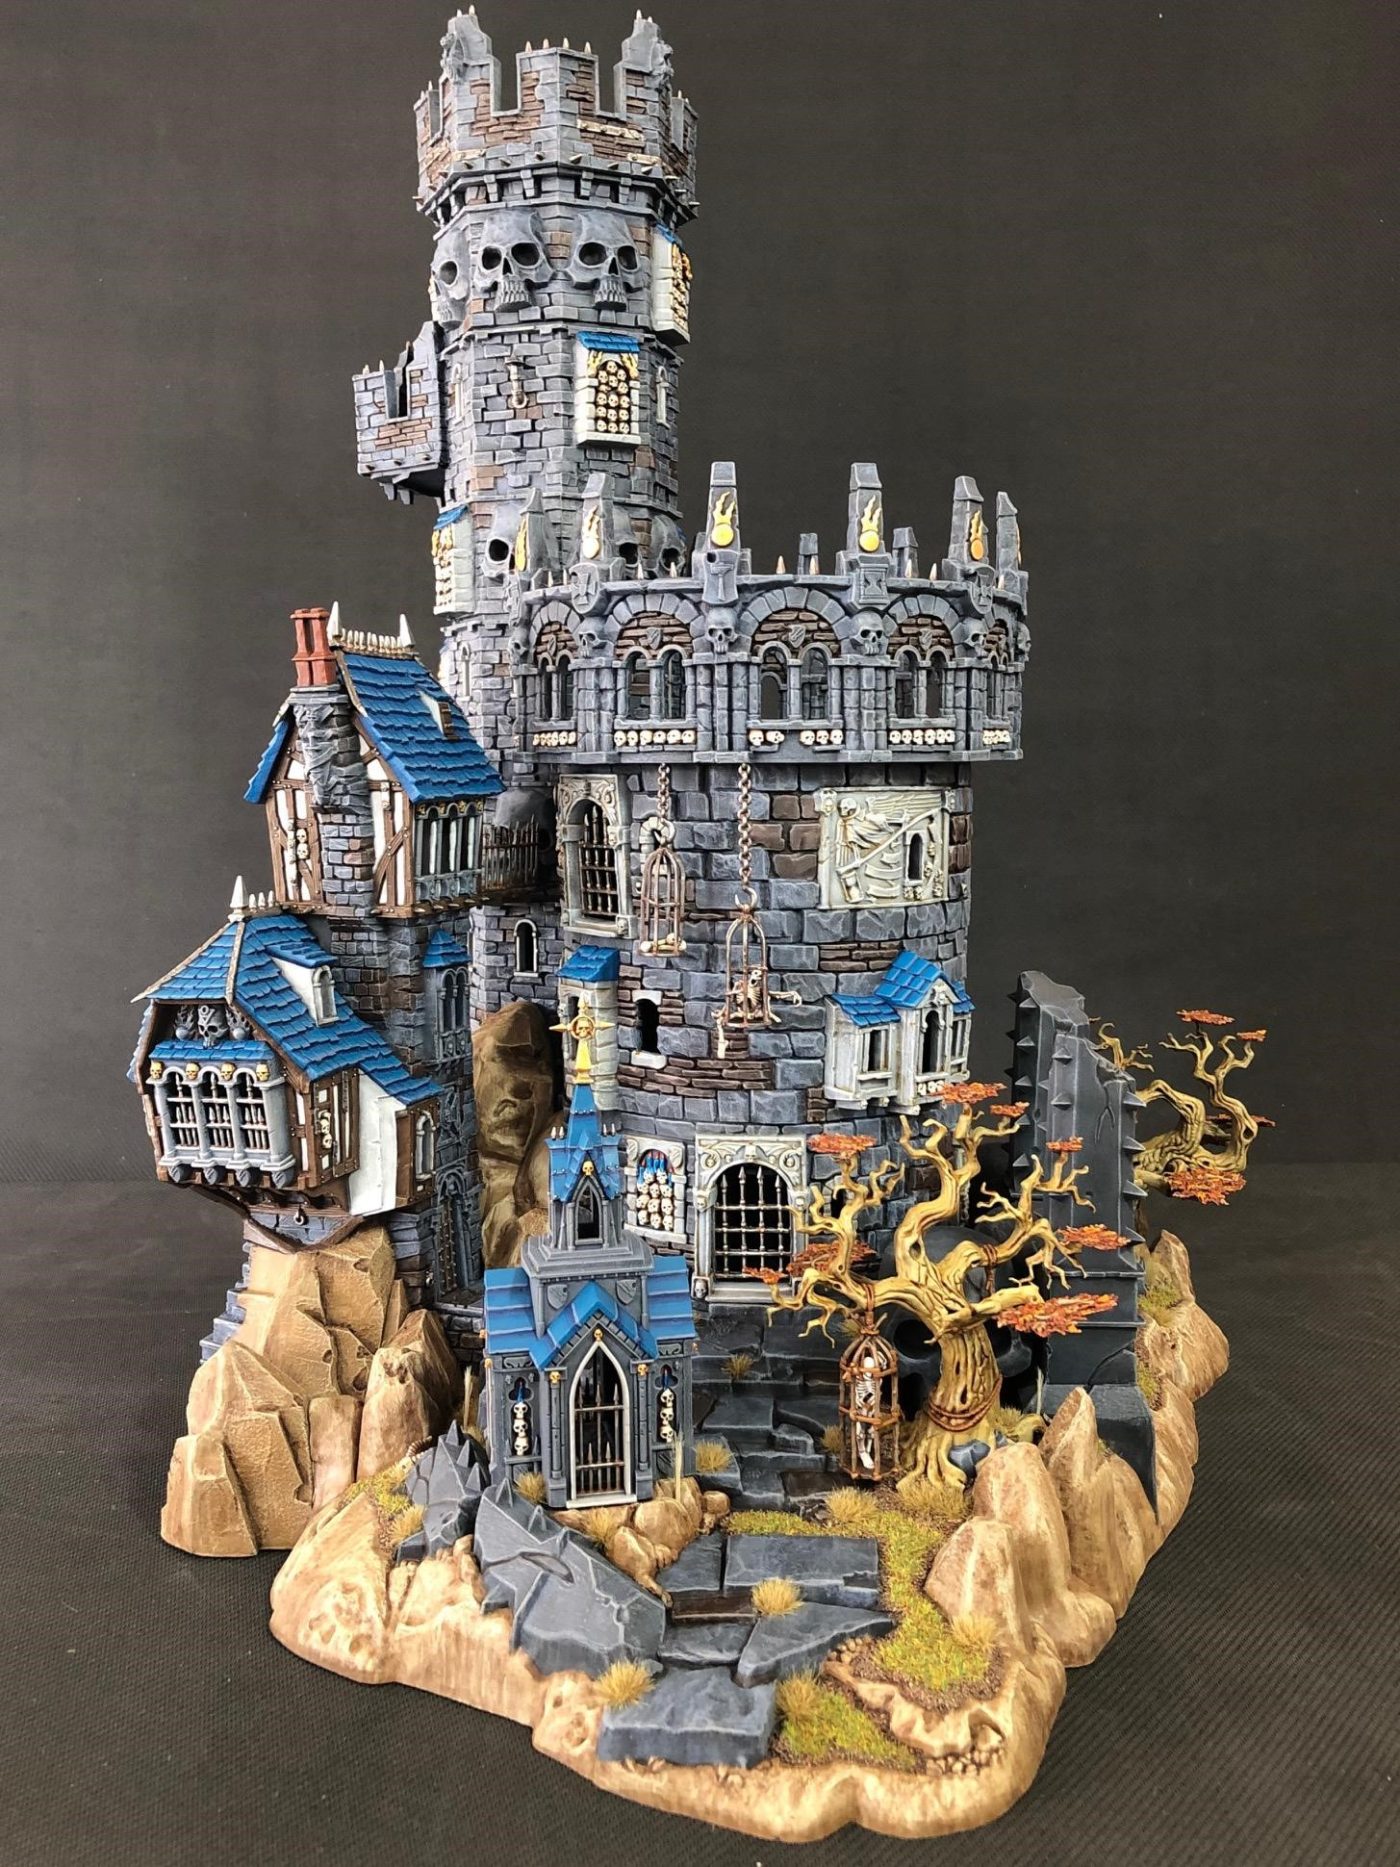
Today we have an amazing hobby project from The Rise of the Doombull in Australia. Have you ever wanted to build a massive Age of Sigmar castle from various kits? Here you go!!! I’ll hand it straight over to Rise of the Doombull himself.
For other great hobby content, check out the hobby section of the site and the Creator Class series.

Background to the Age of Sigmar Castle
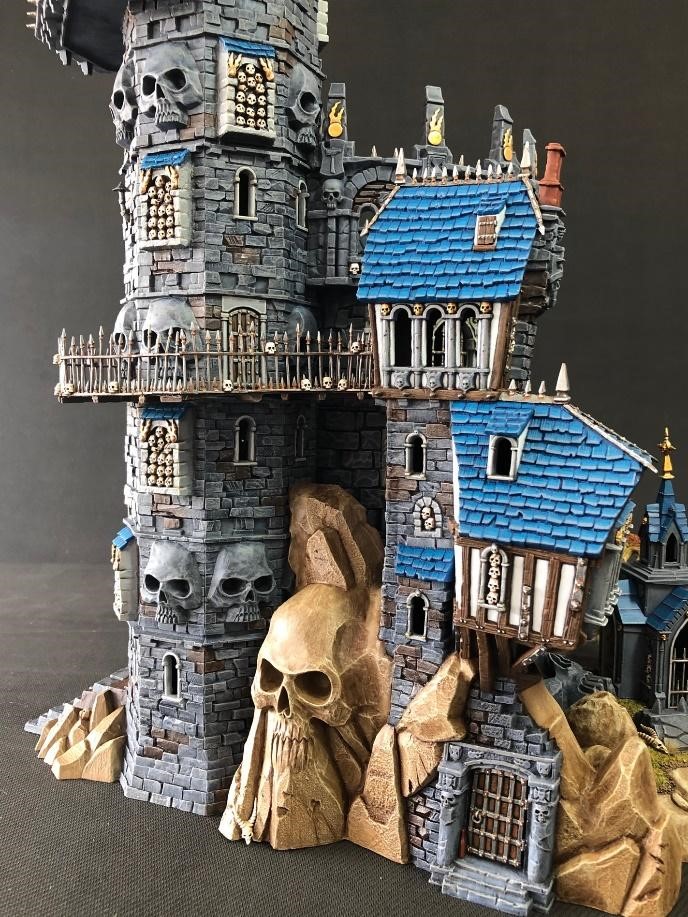
I had been a fan of the Skullvane Manse kit for a long time and had always wanted to grab one and paint it up but never quite got around to it. When the model was re-released as the Warscryer Citadel I dropped into my local Games Workshop and picked one up.
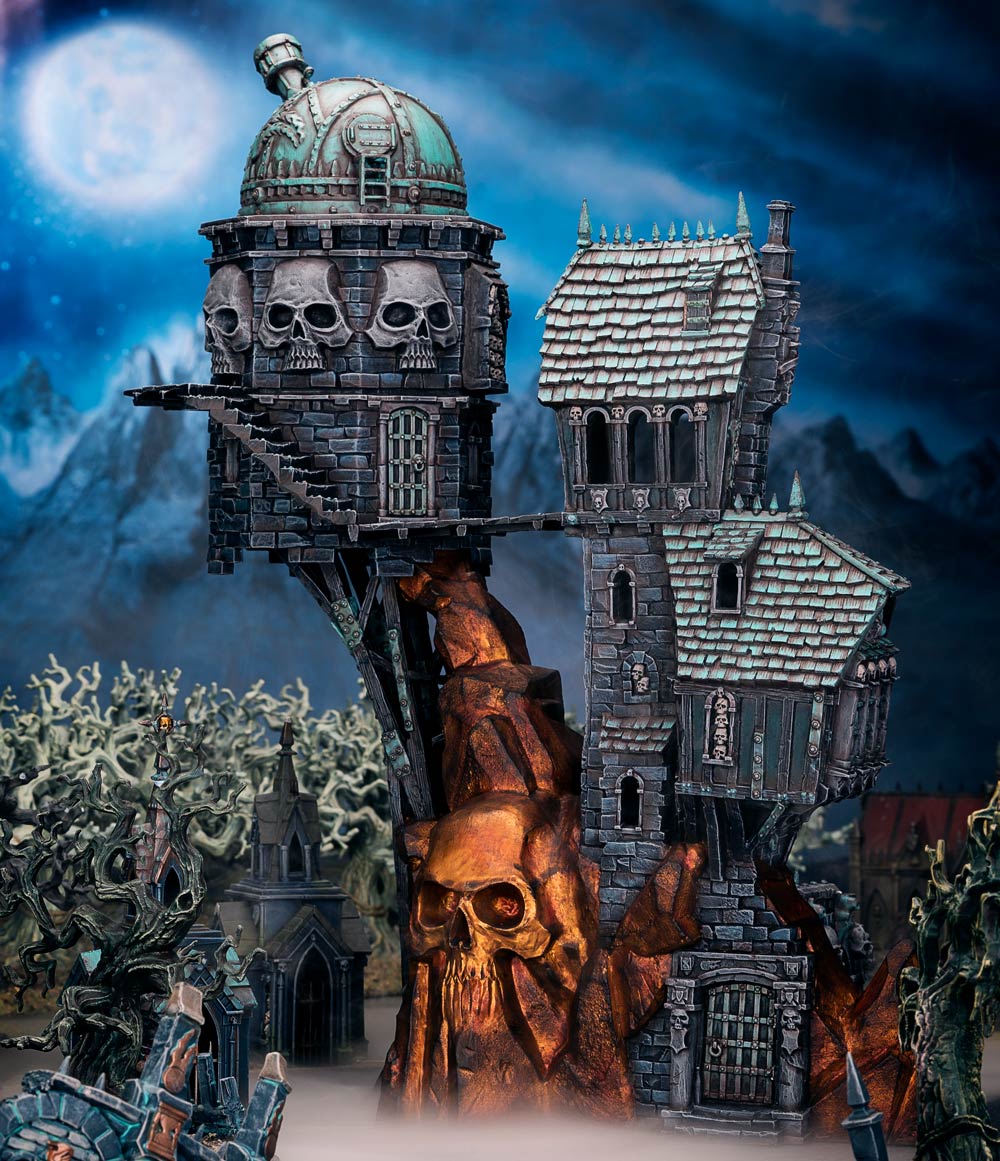
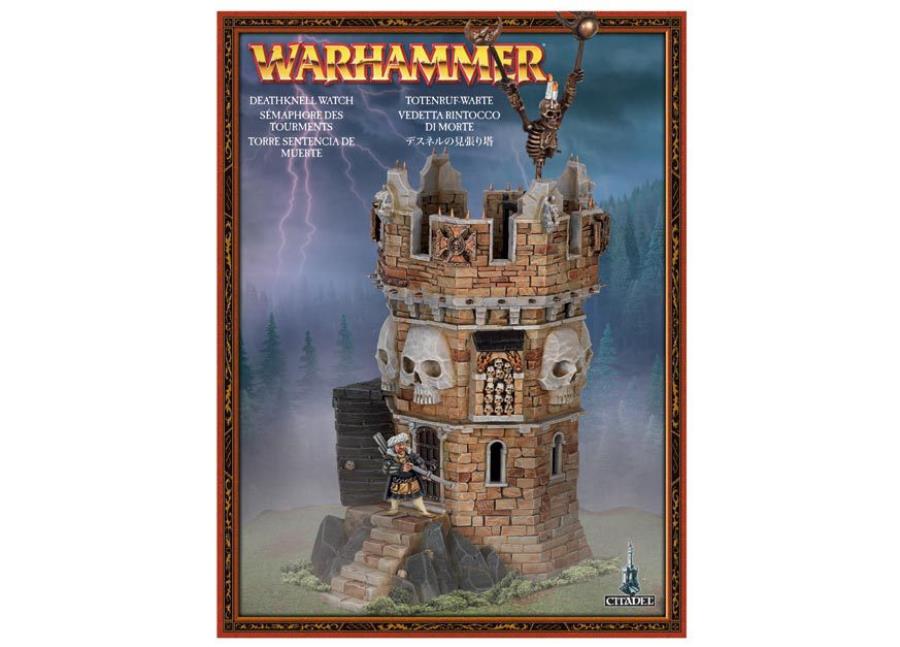
The original plan was to use a Deathknell Watch to make the tower section of the Warscryer Citadel from the ground up (rather than perched on rocks supported by timber as in the original).
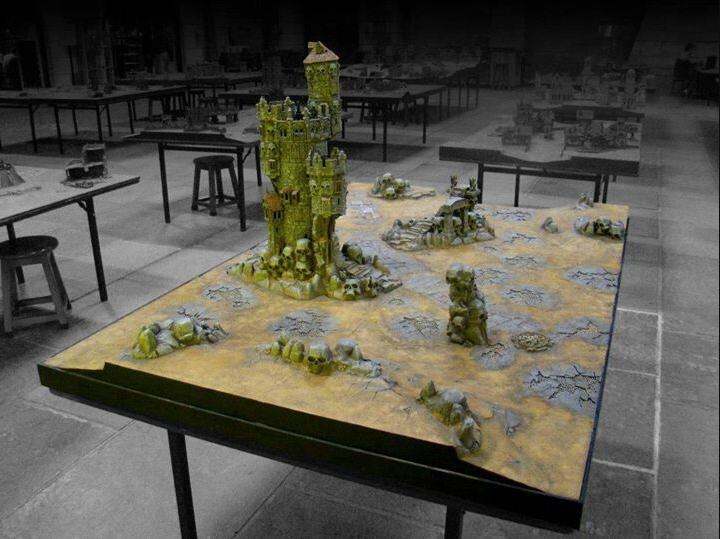
After a bit of Google image searching, I found an image from Warhammer World of the Valley of Skulls table with a huge castle kit combination. After I saw this picture, I decided to grab some extra kits to replicate a smaller version of the main castle on that table.
The Multi-kit Assembly
The full list of kits involved are:
- Temple of Skulls
- Witchfate Tor
- Warscryer Citadel
- Deathknell Watch x 2
- Citadel Wood
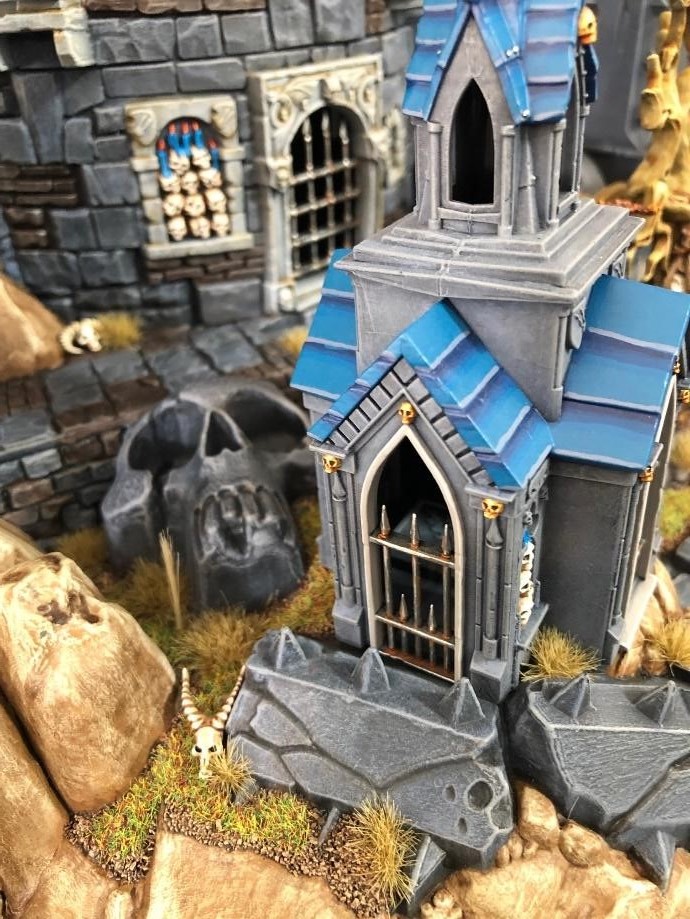
- Garden of Morr
- Hanging cages from Gloomspite Gitz Loonshrine
- Random bits from my bits box
Most of these are no longer available from Games Workshop directly, but you can peruse the current GW terrain here.

Cutting!!!
Most of the kit cutting and conversion was done using an angle grinder. Some might say this is a bit excessive, but it certainly made easy work of the relatively thick terrain kit plastic and could be used carefully on smaller pieces to get pretty tight joins and smooth edges.

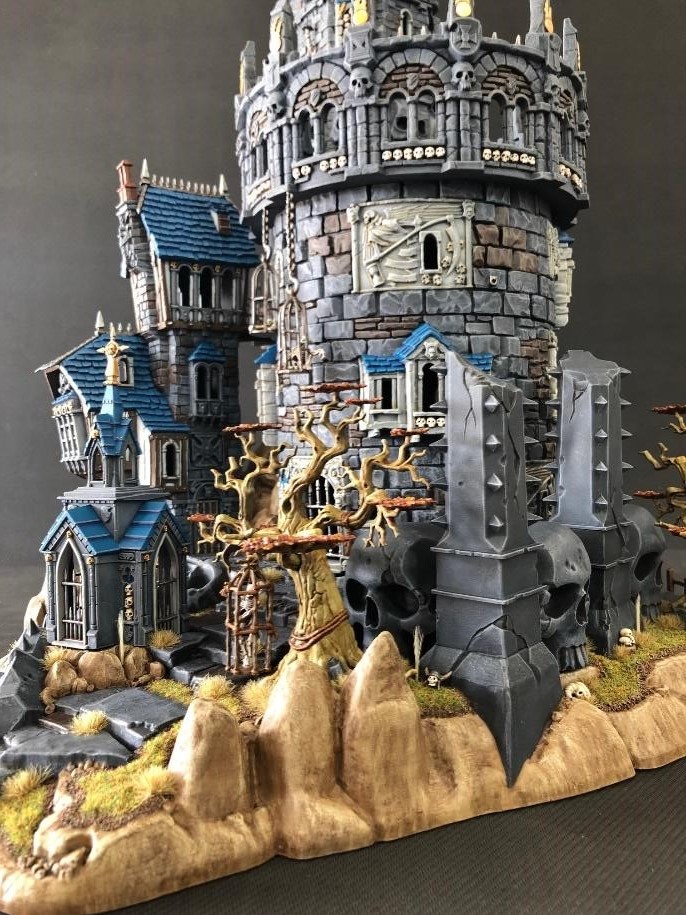
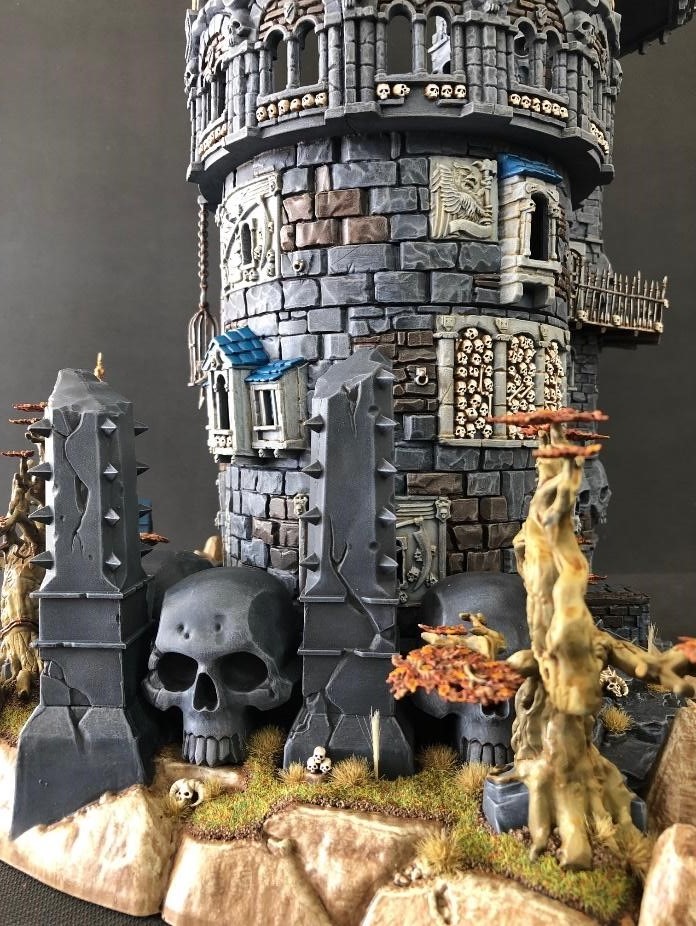
The castle was in three main sub-assemblies, the tower was all one piece, Witchfate Tor on the Temple of Skulls base the second and the building portion of Warscryer Citadel the third. The trees, mausoleum, and timber walkway with rail were all assembled and painted separately as were the cages.
Fill those gaps!!!
Apoxie Sculpt, a two part modelling compound was used extensively for gap filling between all the tower pieces and to sculpt bricks and rocks where necessary to combine everything together. Vallejo Plastic Putty also came in handy for filling smaller gaps quickly.

Age of Sigmar Castle – Painting
Early stages of painting went well and quickly, lots of drybrushing stone and washes to add colour variation to the brickwork.

The Deathknell Watch tall tower was done from start to finish along with the walkway and balcony in a couple of weekends.
Next, the building from Warscryer Citadel, arguably the most fun painting part of the project, was done in about the same length of time.
After this I moved onto Witchfate Tor and the Temple of Skulls. All the rocks on the Temple of Skulls base were pretty simple as was the brickwork to the Witchfate Tor model.

Not long after this I hit a wall though.
Painters Block – Skull Overload
There was a long break where the model sat unfinished in the cabinet, I guess I had bitten off more than I could chew and the detail on the Witchfate Tor felt like I could keep going forever. My recipe for the skulls in the wall sections whilst delivering a great look was time consuming and repetitive. The whole Castle when dry fit together was looking very grey which was bad for motivation as well and I had to take a break.

I took a break to get some paint on a Flesh Eater Courts Army I had picked up, the greens and reds and little bits of assembly and conversion had the hobby inspiration going strong again and once I had the army playable I was ready to smash out the rest of the castle.
Summer Holidays
A bit of time off work in January gave the break I needed to finish the Castle off, I got the skull panels in the walls done first and went back to the brickwork to add more sections of different coloured stone plus darkened them up a bit to add contrast. This combined with more progress on the details such as rusted metals and tarnished gold colours had the Castle nearing completion.
Final Assembly and Finished Project
I could probably have kept going on painting variation in the stone sections, what to leave as carved stone vs what to treat as another material or painted stone. In the end, I had to call it a day at some point and so it was time to get gluing.
This was an immensely satisfying bit of hobby, everything went together well, all the pre-work on gap filling and dry fitting had paid off. Every piece I glued in place added more character and more points of interest.
The final stages adding the cages, static grass, trees and foliage was very gratifying after such a big and extended project.
Hope everyone enjoys the photos.
Cheers,
Rise of the Doombull


Leave a Reply
You must be logged in to post a comment.